How to 3D Print a Lithophane
To 3D print a lithophane, turn a photo into an STL whose thickness follows the picture (dark areas thick, light areas thin, with 0.8 to 3.0 mm as a common starting range), print it in white PLA at 100% infill with fine layers, usually standing upright, and put an LED behind it. Until the light is on, the picture is barely visible.
Updated 2026-11-16
This guide goes through each decision in the order you make it, from the photo to the lamp, with figures from our own lithophane maker. Every number is a starting point: one small test print in your own white PLA tells you more than any table.
What is a lithophane?
A lithophane is a thin plaque of translucent material, normally porcelain, moulded to varying thickness so that a picture shows properly only when it is lit from behind (Wikipedia: Lithophane). In ordinary light it looks like a pale, faintly embossed panel. Put a light behind it and the thin areas glow while the thick areas stay dark. The name joins the Greek lithos, stone, and phainein, to cause to appear.
The European technique was patented in 1827 by the French diplomat Baron Paul de Bourgoing. Meissen began making lithophanes in 1829, KPM in Berlin became the largest producer, and production peaked from about 1840 to 1870. They were made mostly for lampshades, night lights and window panels. The largest collection today belongs to the Blair Museum of Lithophanes in Ohio.
3D printing revived the craft: a printed lithophane works exactly like the porcelain ones, in white plastic.
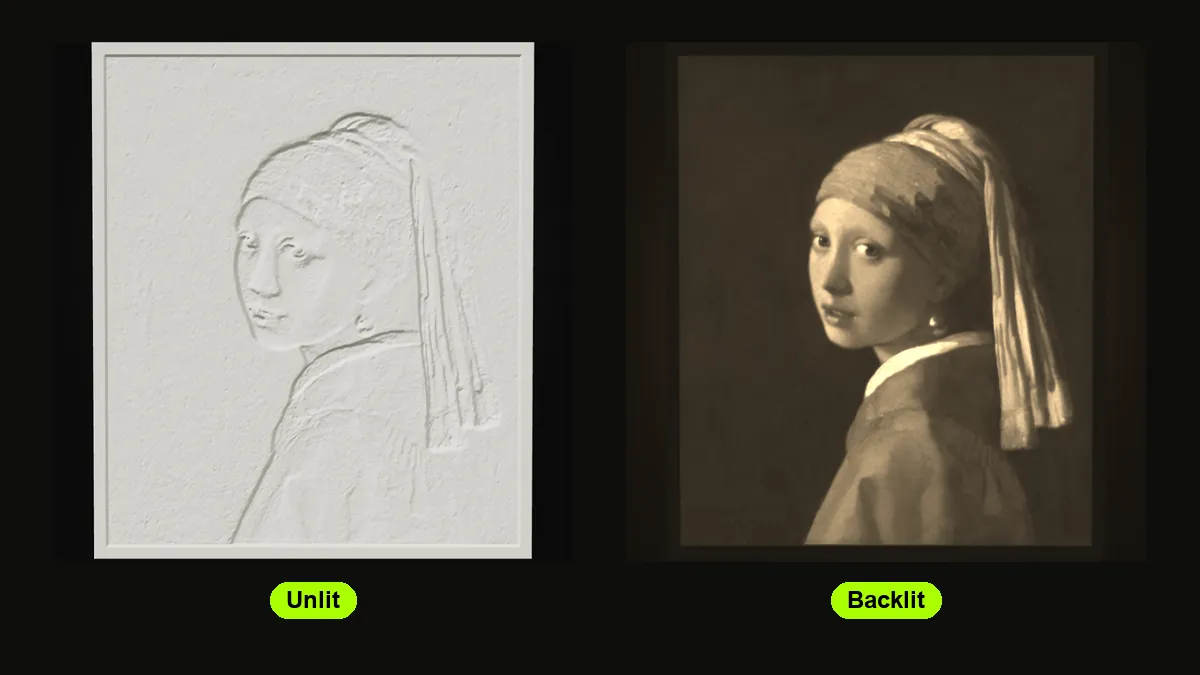
How a lithophane works: thickness controls light
Each pixel of the photo becomes a thickness. A lithophane generator maps brightness between a minimum and a maximum: the brightest pixel gets the minimum, the darkest gets the maximum, and every grey in between lands proportionally in between. Light loses strength the more plastic it crosses, so thin areas glow and thick areas stay dark.
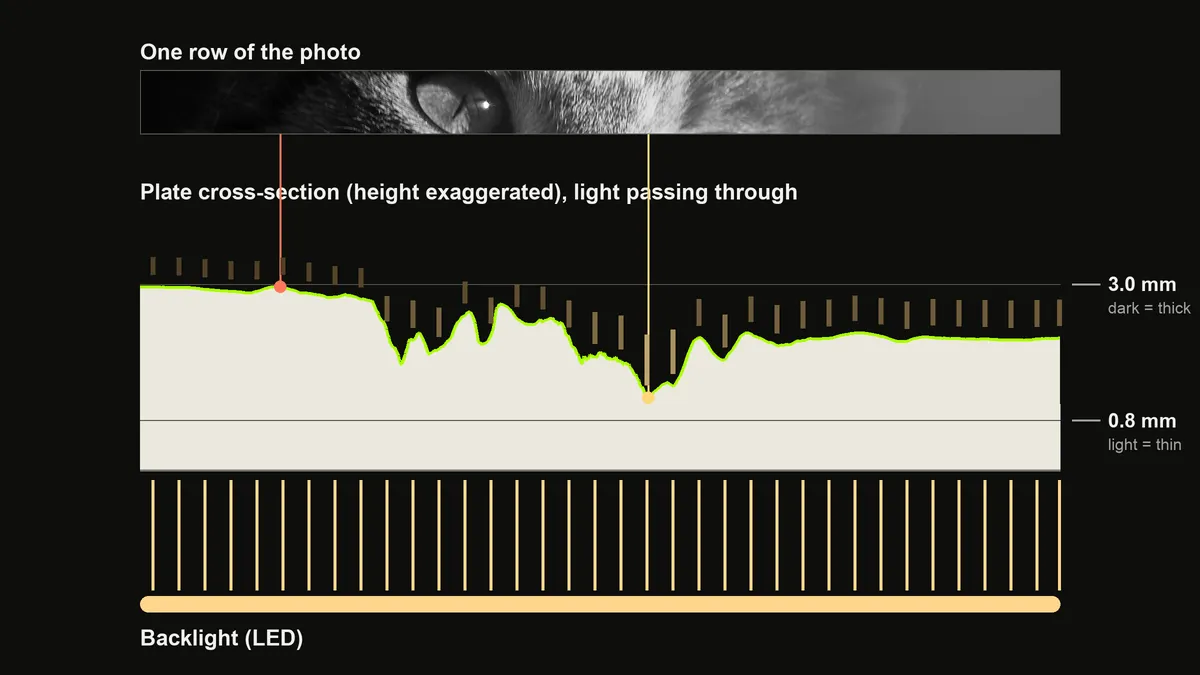
This is the reverse of an ordinary relief, where bright pixels are raised. If you want a raised picture to look at in normal light, make a PNG to STL relief instead.
Step 1: Choose a photo
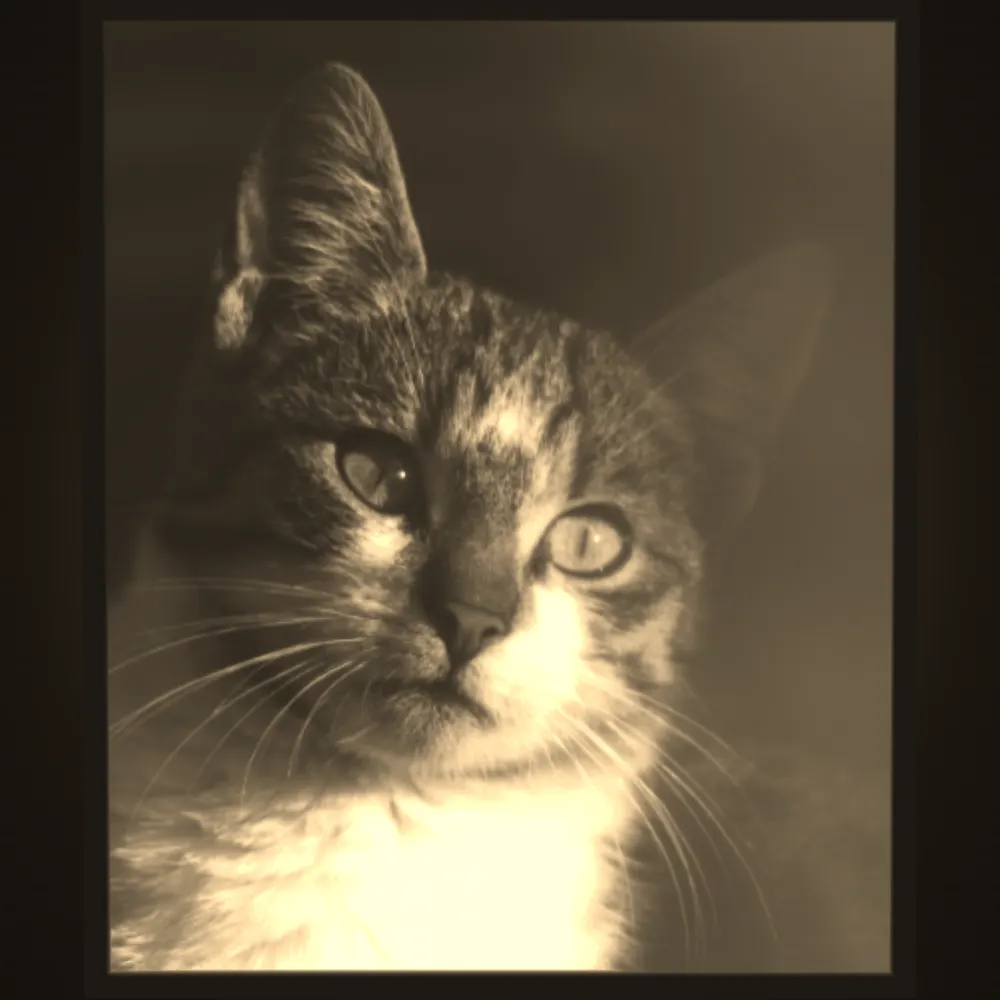
- A clear subject with real contrast. A face lit from the front, a pet with sharp eyes, a landscape with bright sky and dark land. Hazy, all-grey photos stay flat when lit.
- A simple background. A cluttered background competes with the subject. A dark one is fine: it prints thick and frames the subject.
- Enough pixels, no more. At its default detail, our tool samples about 500 points along the long side of the plate, roughly one every 0.2 mm on a 100 mm panel. A photo of 1,000 pixels or more is plenty, and any phone photo has that.
- Colour is ignored. Only brightness is used, so there is no need to convert to black and white first. Brightness and contrast adjustments help far more.
Step 2: Set the minimum and maximum thickness
The best thickness for a lithophane print depends on your filament and your light, but 0.8 mm minimum and 3.0 mm maximum is the usual place to start. Several free lithophane generators use that range by default, and the open-source LithoMaker treats 0.8 mm as its minimum; its author also advises never going above 5.0 mm in total. With a standard 0.4 mm nozzle, 0.8 mm means even the brightest areas get two passes of plastic.
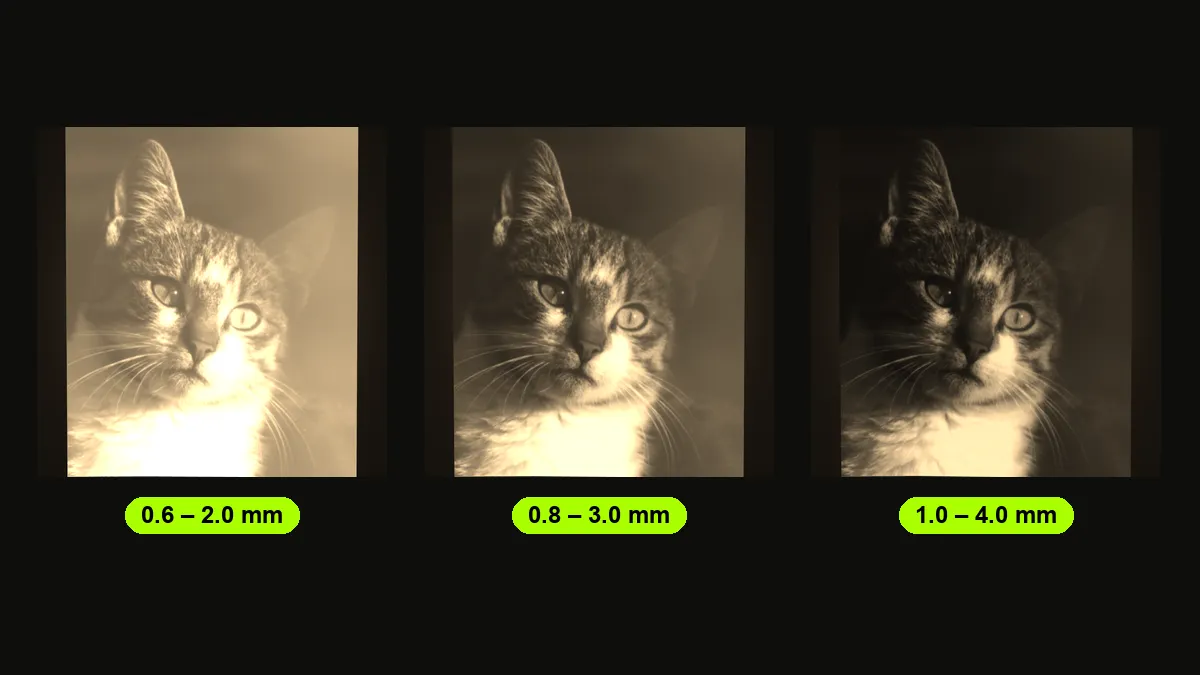
- Thinner (0.6–2.0 mm): brighter overall and fine with a weak light, but the blacks turn grey and the thinnest spots are fragile.
- Balanced (0.8–3.0 mm): the default in our lithophane maker.
- Thicker (1.0–4.0 mm): deeper shadows and more depth, but it needs a brighter lamp and takes longer to print.
Treat the range as a starting point, not a law. White PLA from different brands lets through different amounts of light.
Step 3: Size, detail and frame
Most flat lithophanes are 80 to 150 mm wide; bigger plates show more of the photo but print for longer and flex more. A finer mesh makes a bigger file, yet the nozzle (0.4 mm on most printers) smooths out anything much smaller than itself, so extreme detail settings buy little.
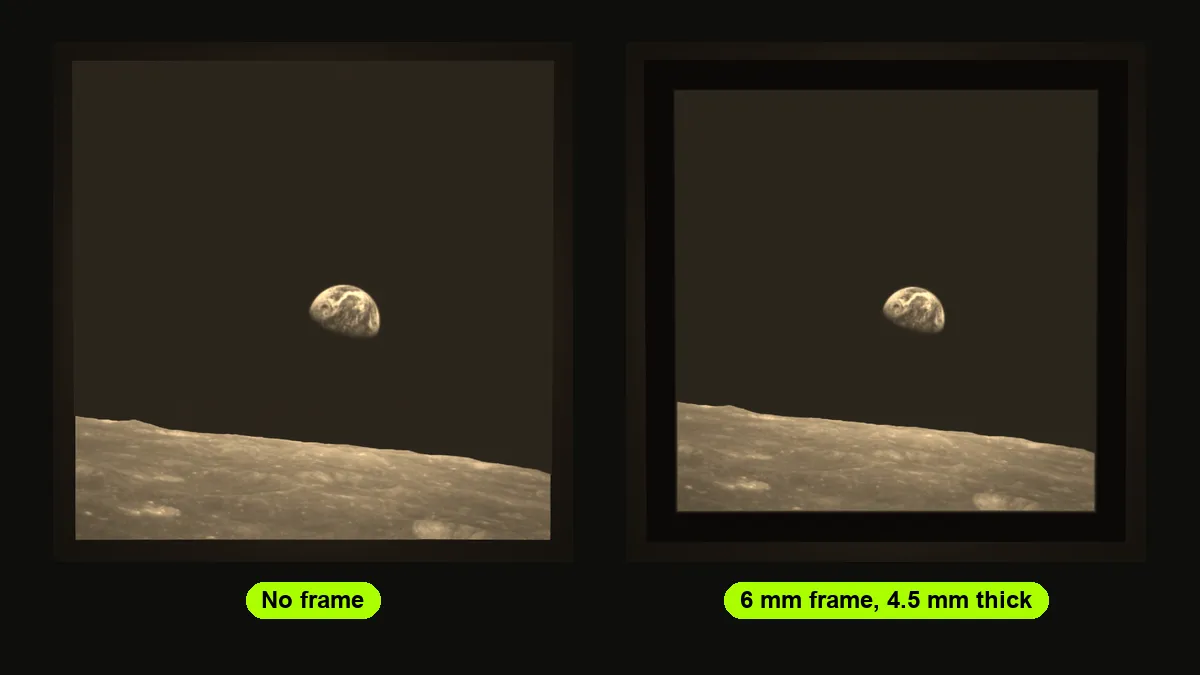
A frame is a solid border around the picture. It stiffens the plate, gives the print a clean edge, and when it is thicker than the maximum thickness it reads as a dark border once lit.
Step 4: Pick a shape: flat, curved or cylinder
- Flat: the classic panel for picture frames, light boxes and windows.
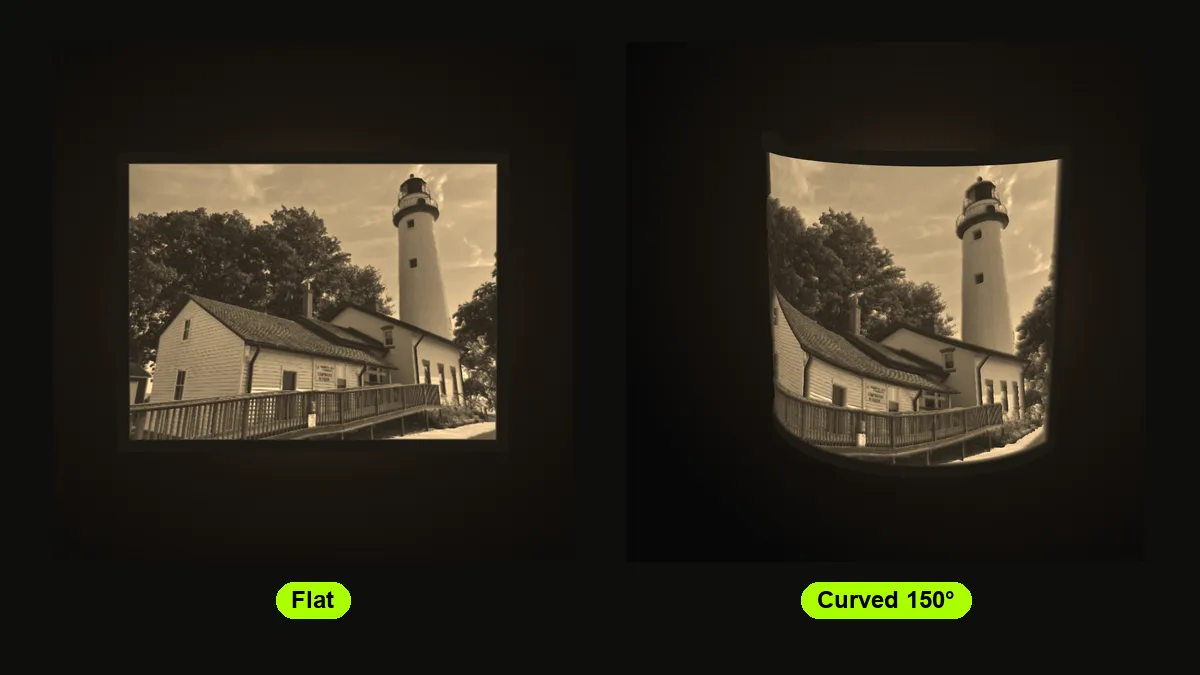
- Curved: bending the plate (60 to 200° in our tool) lets it stand on a shelf by itself, and a curved plate is steadier than a flat one while it prints on edge.
- Cylinder: a lamp shade with the photo wrapped all the way round. The height follows the photo’s aspect ratio. An 80 mm cylinder is about 251 mm around, so a 3:2 photo comes out about 170 mm tall and a portrait photo over 300 mm. Wide or panoramic photos make the best lamps.
Make the STL in your browser
Flat, curved or cylinder lithophanes with a backlit preview, thickness in mm and upright or flat export. Free, and your photo is never uploaded.
Step 5: Print orientation: upright or flat
Both ways of putting a flat lithophane on the bed have their supporters.
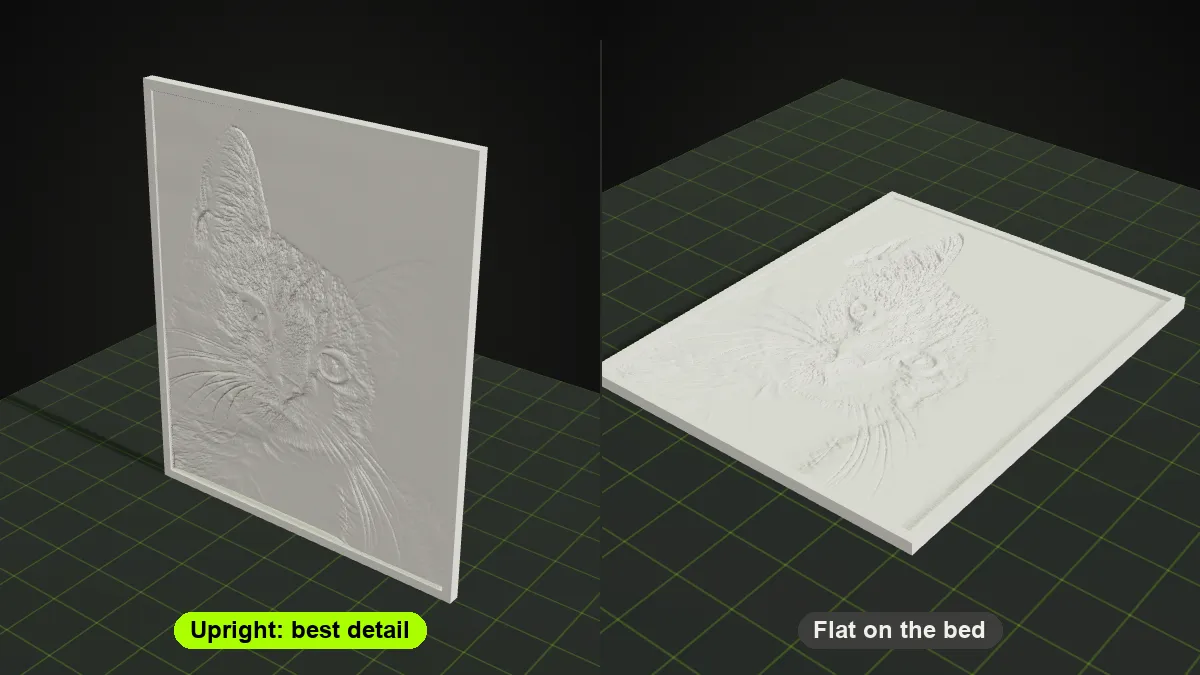
Upright, on its edge. The plate’s thickness is drawn inside each layer by where the nozzle places the wall, so it changes smoothly, and the photo’s vertical detail comes from the layer height. All3DP recommends printing lithophanes vertically (All3DP lithophane guide). The catch: a tall, thin part can wobble or come loose, so add a brim and print slowly.
Flat on the bed. Steady, quick and easy to start. But the thickness is now built from stacked layers, so it comes in steps: a 0.8–3.0 mm range gives only 11 steps with 0.2 mm layers and about 22 with 0.1 mm layers. Prusa’s blog prints lithophanes flat to prevent wobble, with 0.1 mm layers (Prusa: From 2D to 3D).
Our lithophane maker exports flat panels upright by default and offers Flat on the bed as an option. Curved and cylinder lithophanes always print standing, which is how they sit on the bed without supports.
Step 6: Lithophane slicer settings
| Setting | Starting point | Why |
|---|---|---|
| Infill | 100% | Gaps inside the plate show as lines when lit. Prusa suggests at least 90%. |
| Layer height | 0.1–0.12 mm | More layers mean finer vertical detail (upright) or more grey steps (flat). |
| Nozzle | 0.4 mm; 0.25 mm for very fine work | Prusa pairs a 0.25 mm nozzle with 0.05 mm layers for its best quality. |
| Speed | Slow, under about 33 mm/s | All3DP’s figure; thin walls and tall parts come out cleaner slowly. |
| Brim | Yes when upright | Keeps a thin plate stuck to the bed. |
| Supports | None | A plate on its edge or lying flat has no overhangs. |
| Filament | White PLA | Translucent white gives even tones; Prusa advises against wood-filled or altered filaments. |
The infill and filament advice comes from Prusa’s article on filament transparency, which also suggests 0.1 mm layers.
Step 7: Light it
Use LED light. LEDs stay cool, and PLA starts to soften around its glass transition of 60–65 °C (Wikipedia: Polylactic acid), so keep hot incandescent or halogen bulbs away from the plate.
Warm white light gives the amber, sepia look of the previews in this guide; cool or daylight white gives a neutral grey. Put the light a few centimetres behind the plate and diffuse it if you see a hot spot. Flat panels look most even in front of an LED panel or light box; a cylinder lamp needs an LED puck light or tea light inside.
About the backlit images
The glowing figures in this guide come from our tool’s backlit preview, a shader simulation of light through white PLA. They are not photographs of prints; your filament and lamp will shift the tones.
Common problems and fixes
| Problem | Likely cause | Fix |
|---|---|---|
| Too dark, even with the lamp on | Maximum thickness too high for the light | Lower the maximum to about 2.5 mm, raise brightness, or use a brighter LED |
| Washed out, little contrast | Thickness range too thin, or a flat photo | Raise the maximum, add contrast, pick a photo with deeper shadows |
| Lines or a grid pattern when lit | Infill below 100%, or coarse layers | 100% infill, finer layers, print upright |
| Plate wobbles or breaks loose | Tall, thin part standing on its edge | Add a brim and a frame, slow down, or use a curved shape |
| Holes in the brightest areas | Minimum thinner than the nozzle can build | Raise the minimum to 0.8 mm |
| Grainy, bumpy surface | Photo noise turned into thickness | Add smoothing before export |
Summary
That is how to 3D print a lithophane in short: pick a contrasty photo, start at 0.8–3.0 mm, choose a shape, print in white PLA at 100% infill with fine layers (upright for smoother tones, flat for an easier print) and light it with an LED. After the first test print, change one setting at a time.
Frequently asked questions
What is a lithophane?
A lithophane is a thin, translucent plate moulded to varying thickness, so a picture appears when it is lit from behind: thin areas glow and thick areas stay dark. The European technique was patented in porcelain in 1827; today the same idea is 3D printed in white PLA.
What is the best thickness for a lithophane print?
Start with 0.8 mm for the brightest areas and 3.0 mm for the darkest. Several free generators use that range by default, and 0.8 mm is two lines of a standard 0.4 mm nozzle. Go thinner for weak light, thicker for deeper blacks, and test in your own filament.
Should a lithophane be printed vertically or flat?
Both work. Upright gives smoother grey tones because the thickness is drawn within each layer, but the tall thin part needs a brim and slow speeds. Flat is steadier and faster, but the thickness comes in layer-height steps, so use fine layers.
What infill should I use for a lithophane?
Use 100% infill. Any gap or pattern inside the plate changes how light passes through and shows up as lines when the lithophane is lit. Prusa’s own guidance is at least 90%.
What filament is best for lithophanes?
Plain white PLA. It is translucent enough to glow and opaque enough to hold contrast. Prusa recommends standard PLA and advises against wood-filled or otherwise altered filaments, even when the base polymer is PLA.
What light should I put behind a lithophane?
An LED. It stays cool, while PLA starts to soften around 60–65 °C, so hot incandescent or halogen bulbs should not sit close to the plate. Warm white gives an amber, sepia look; cool white gives neutral grey.